How to Create an MX Record
To add an MX (Mail Exchanger) record, follow the below instructions.
General Steps to Add an MX Record
- Sign In: Log in to your domain registrar (e.g., GoDaddy, Namecheap) or DNS hosting provider (e.g., Cloudflare).
- Find DNS Settings: Navigate to your domain's DNS settings, often labeled "DNS Management," "Zone File Settings," or "Advanced DNS".
- Add New Record: Click to add a new record and select MX (Mail Exchanger) as the record type.
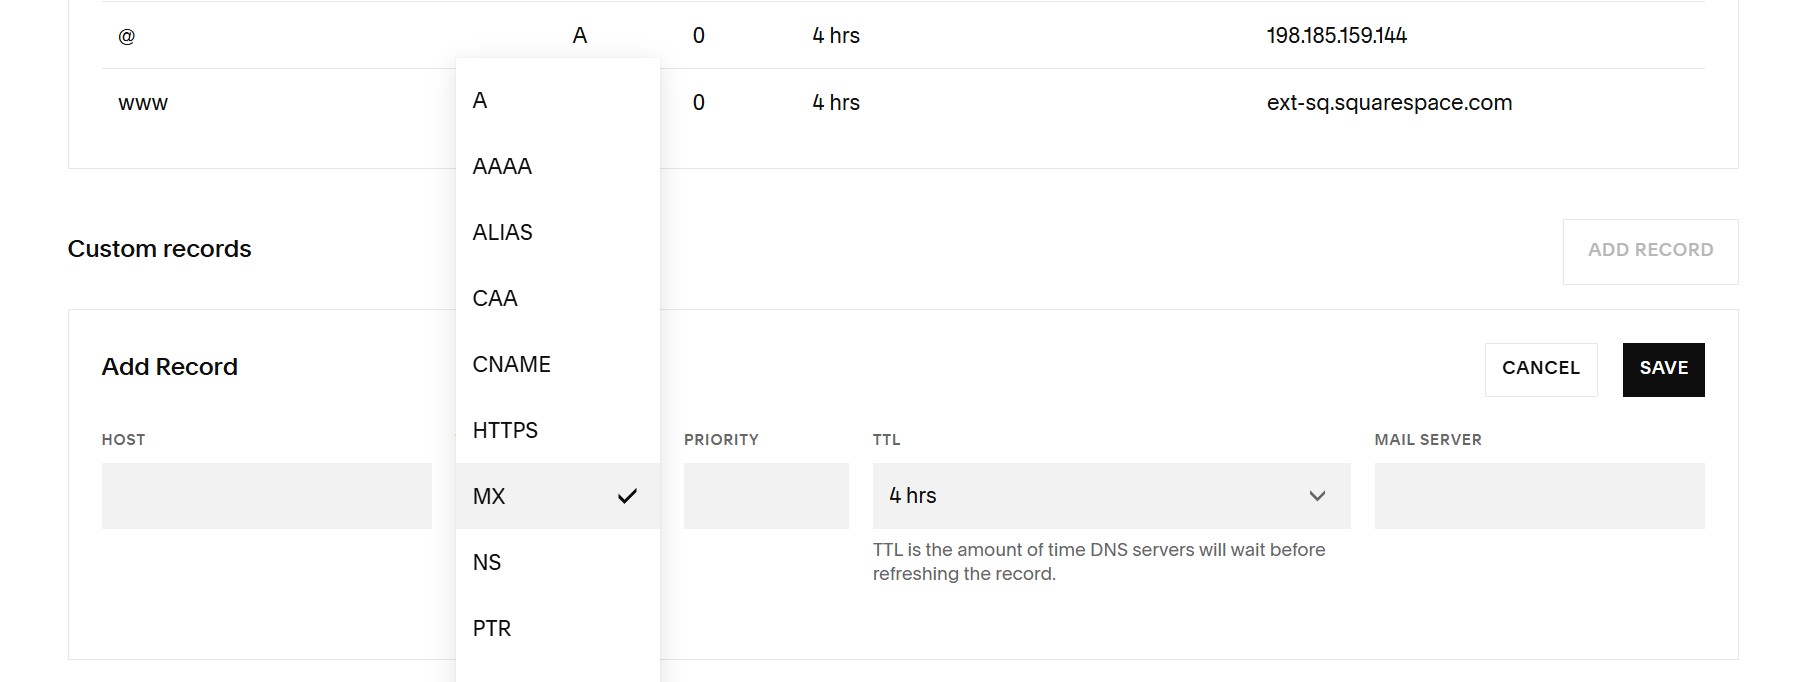
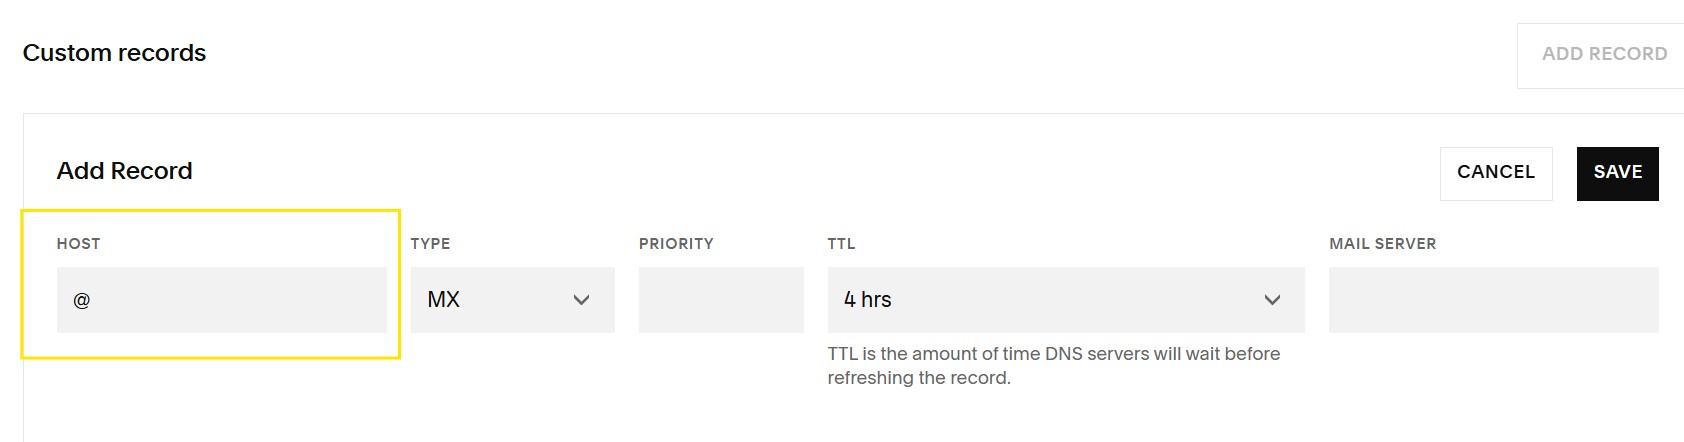
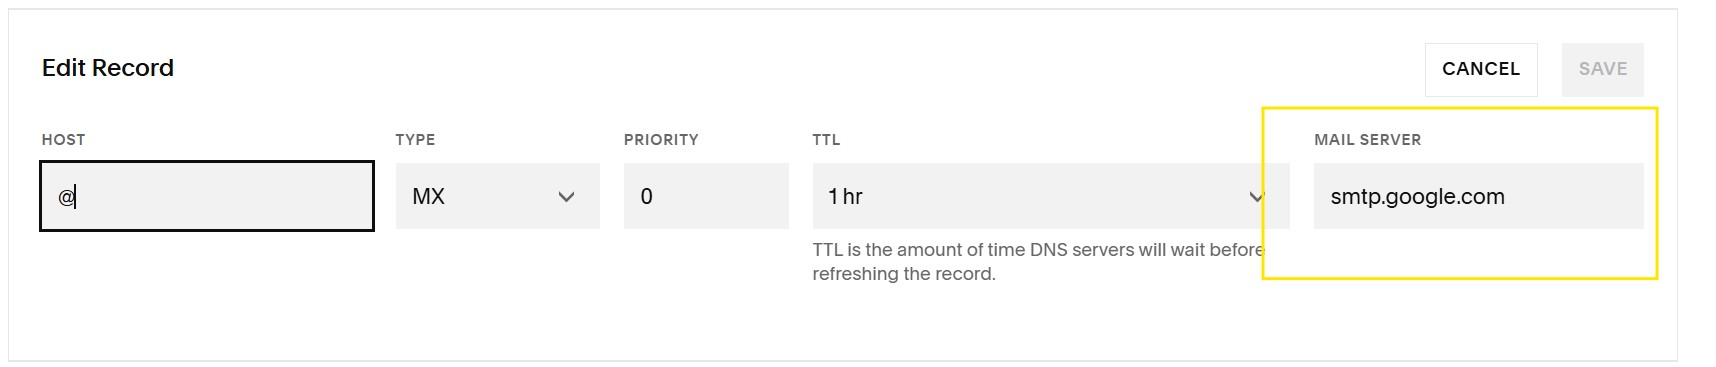
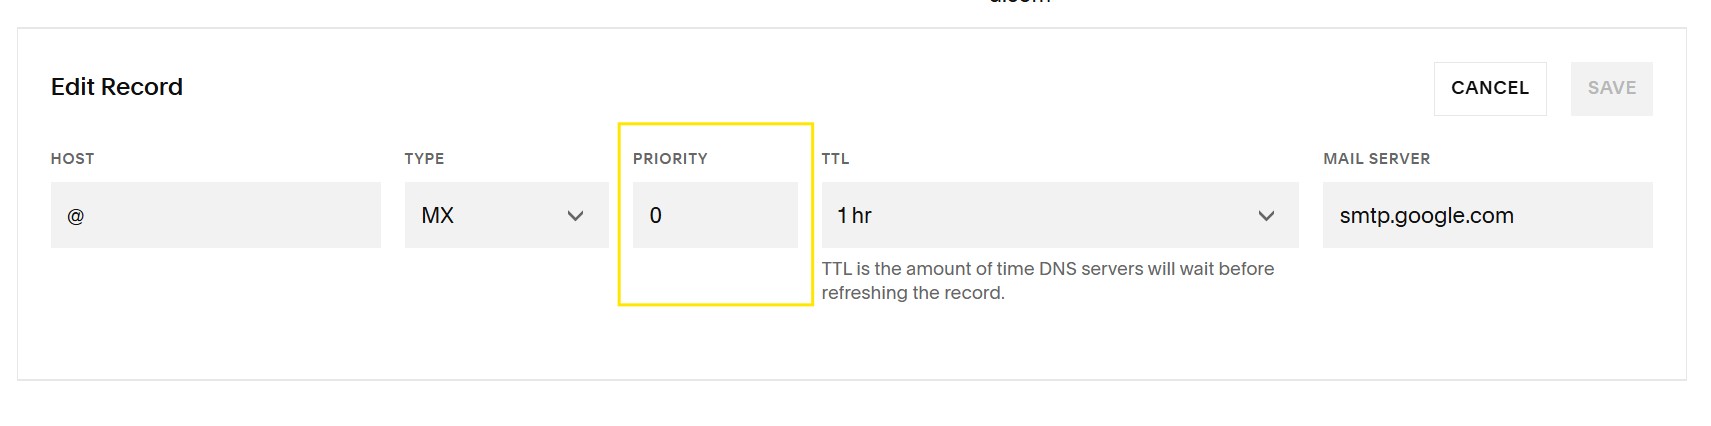
4. Enter Details (from your email provider):
- Host/Name: Enter @ or leave it blank for your main domain (e.g., yourdomain.com).
- Value/Points To/Mail Server: Enter the mail server address (e.g., smtp.google.com or an address from Microsoft 365).
- Priority: Enter the priority number (e.g., 1, 10, 20) – lower numbers mean higher priority.
- TTL (Time to Live): Use the default or a common value, such as 3600 (seconds).
5. Save: Save the new MX record and any changes.
6. Wait: Allow time (up to 48-72 hours) for the changes to spread across the internet (DNS propagation).